Step-by-Step Solar Installation Process: Your Complete Guide
Switching to solar energy is one of the smartest decisions for homeowners and businesses alike. With electricity rates rising and climate concerns growing, the time to invest in clean, renewable energy has never been more urgent. If you’re considering solar, understanding the solar installation process is the foundation for making a well-informed decision. In this comprehensive guide, we’ll walk you through every phase, from initial planning to long-term maintenance, using practical insights and expert recommendations.
Whether you’re exploring DIY solar installation or hiring professionals, this article provides the clarity and confidence you need to transition to solar power. Let’s get started.
Table of Contents
- 1 Why Go Solar?
- 2 1. Initial Assessment and Site Evaluation
- 3 2. Choosing the Best Solar Panel System
- 4 3. Financial Planning & Permits
- 5 4. Solar System Design & Engineering
- 6 5. Installation Day – Fitting the Panels
- 7 6. Inspections and Utility Interconnection
- 8 7. System Activation & Monitoring Setup
- 9 8. Maintenance and Support
- 10 9. Types of Solar Installations
- 11 10. DIY Solar Installation: Pros and Cons
- 12 11. Understanding the Solar Installation Timeline
- 13 12. Solar Installation Checklist
- 14 13. Phases of Solar Panel Installation
- 15 14. Beginner’s Guide to Solar Installation
- 16 15. How to Set Up a Solar Power System
- 17 16. Steps After Deciding on Solar Installation
- 18 17. Understanding Solar Panel Installation in Full
- 19 Final Thoughts: How Solar Installation Works
- 20 FAQs
Why Go Solar?
Before diving into the solar system installation process, let’s briefly explore the benefits of switching to solar energy:
- Lower electricity bills
- Increased property value
- Reduced carbon footprint
- Access to government incentives and rebates
With decreasing solar panel installation cost, solar has become more accessible than ever. Whether you’re installing solar panels for home or commercial use, solar energy delivers long-term returns.
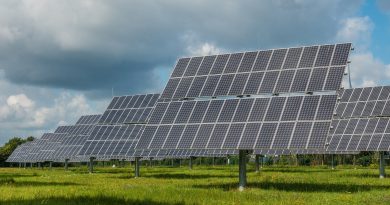
1. Initial Assessment and Site Evaluation
The first stage in the residential solar installation process involves evaluating the solar potential of your property. This assessment covers:
- Roof angle, direction, and usable surface area
- Amount of sunlight exposure
- Shade from trees, chimneys, or other structures
- Roof condition and structural soundness
These details help determine how many solar panels for home you’ll need and what energy output to expect.
2. Choosing the Best Solar Panel System
Not all panels are created equal. After your site assessment, you’ll select the best solar panels for home based on:
- Efficiency ratings
- Warranty terms
- Durability under local climate conditions
- Brand reputation
Popular options for the best solar panel include monocrystalline panels for their high efficiency, and polycrystalline for budget-conscious setups. Be sure to compare quotes from multiple vendors.
3. Financial Planning & Permits
Understanding the solar panel installation cost is critical. It generally includes:
- Panel equipment and inverter
- Mounting hardware
- Labor costs
- Permit and inspection fees
You can reduce your investment using:
- Federal and state tax credits
- Local utility rebates
- Solar loans or Power Purchase Agreements (PPAs)
Navigating the permitting process is part of the solar installation procedure guide. Most professional installers will handle this for you.
4. Solar System Design & Engineering
Engineers then draft a system tailored to your property’s specs. At this solar setup process stage, they decide:
- Panel layout and tilt
- Inverter placement
- Energy output calculations
This is submitted to local authorities for approval and marks a crucial phase in the solar energy installation steps.
5. Installation Day – Fitting the Panels
The exciting part begins: installing solar panels at home or your business premises. The key solar panel fitting steps include:
- Installing racking and mounting equipment
- Affixing panels securely to your roof or ground mounts
- Wiring panels to inverters and the electrical system
- Connecting to the power grid
This phase, a centerpiece of the solar power installation procedure, usually takes 1–3 days depending on system complexity.
6. Inspections and Utility Interconnection
After the panels are installed, inspections ensure everything complies with local safety codes and utility standards. Then, your utility grants permission to operate (PTO). This is essential for grid-tied systems, as required by the solar installation process overview.
7. System Activation & Monitoring Setup
Once approved, your system goes live. You can now monitor energy generation via mobile apps or web portals. These tools are part of modern guide to solar panel installation and help you:
- Track daily output
- Monitor system health
- Detect issues early
8. Maintenance and Support
Though solar systems require minimal upkeep, understanding the essentials of solar installation process includes knowing how to maintain your setup. Tips:
- Clean panels 2–4 times a year
- Schedule annual inspections
- Watch for shading changes (tree growth, new structures)
Reliable installers offer service warranties and remote performance monitoring.
9. Types of Solar Installations
- Residential Installations
In the residential solar installation process, aesthetics matter. Panels must align with your roof design while maximizing performance.
- Commercial Solar Panel Installation
Commercial solar panel installation is larger in scope, often involving energy storage solutions and advanced grid synchronization. These systems provide high ROI for offices, warehouses, and industrial units.
10. DIY Solar Installation: Pros and Cons
Interested in DIY solar installation? While it’s cost-effective, it’s also risky. You need:
- Technical knowledge of electricity
- Familiarity with local building codes
- Tools and physical capability to install panels
For most users, hiring certified professionals is a safer and more efficient path in the solar panel installation for beginners journey.
11. Understanding the Solar Installation Timeline
Here’s a typical solar installation timeline:
- Weeks 1–2: Evaluation and system design
- Weeks 3–4: Permit approvals
- Week 5: Installation
- Week 6: Inspection and PTO
Keep in mind, weather and permit delays can stretch the schedule.
12. Solar Installation Checklist
Follow this comprehensive solar installation checklist:
- ✅ Assess solar potential
- ✅ Select system components
- ✅ Compare vendor quotes
- ✅ Apply for financing
- ✅ Get permits
- ✅ Complete installation
- ✅ Final inspection
- ✅ System activation
13. Phases of Solar Panel Installation
The phases of solar panel installation break down like this:
- Initial consultation
- Site visit and analysis
- Design and engineering
- Permits and paperwork
- Equipment delivery
- Physical installation
- Inspection and interconnection
- Activation
14. Beginner’s Guide to Solar Installation
Here’s a quick beginner’s guide to solar installation:
- Learn about panel types (mono vs. poly)
- Compare inverter efficiency
- Understand warranty periods
- Research financing and incentives
- Work with NABCEP-certified installers
This solar installation procedure guide simplifies what could otherwise feel overwhelming.
15. How to Set Up a Solar Power System
Still wondering how to set up solar power system correctly?
- Assess your roof orientation and shading
- Choose the right system size (kW)
- Select quality components (panels, inverter, battery)
- Hire licensed professionals
- Register your system with the local utility
This approach guarantees optimal performance and safety.
16. Steps After Deciding on Solar Installation
Once you’ve decided to go solar, here are your next steps after deciding on solar installation:
- Secure quotes from 2–3 companies
- Apply for available incentives
- Understand energy consumption
- Sign agreements
- Begin permitting and scheduling
Every detail contributes to a smooth solar installation process.
17. Understanding Solar Panel Installation in Full
Understanding solar panel installation means knowing it’s more than placing panels on a roof. It’s a regulated, engineered system that integrates with your electrical infrastructure. Each part of this solar energy setup procedure must be customized for your unique site and energy needs.
Final Thoughts: How Solar Installation Works
The entire solar installation process overview we’ve explored can take several weeks, but the long-term savings and environmental benefits are well worth the effort. Now that you understand how solar installation works, you can approach it with confidence and clarity.
Solar energy is the future, and your journey begins with action. Whether you choose DIY solar installation or work with certified pros, following this guide ensures your transition to solar is seamless.
Still have questions or want expert help? Dive into tools, insights, and installer networks at solarclue.com, and keep learning on blog.solarclue.com — let’s turn sunlight into savings, together.
FAQs
Q1: How much does solar panel installation cost?
A: The solar panel installation cost ranges between $10,000–$25,000 for residential setups, depending on size, type, and location. Incentives can significantly reduce this.
Q2: What are the main steps for installing solar panels?
A: Site evaluation, system design, permitting, installation, inspection, and activation. These are core steps for installing solar panels.
Q3: Is it possible to install solar panels myself?
A: Yes, but unless you’re experienced with electrical systems and permitting, it’s better to hire experts.
Q4: How long does the solar installation process take?
A: Usually 4–8 weeks, but it can vary due to local regulations and weather.
Q5: What should I ask before starting the solar installation process?
A: Ask about warranties, maintenance, performance guarantees, and timelines. Refer to this solar panel installation guide for full details.