Solar Panel Installation Steps and Tips for Homeowners
Installing a solar panel system at home is one of the smartest investments you can make today. Whether you’re driven by rising electricity bills, environmental concerns, or the desire for energy independence, understanding the solar panel installation steps and applying key solar panel installation tips will ensure a smooth and efficient setup. If you’re planning the best solar panel installation for your home, this guide is tailored for you.
Table of Contents
Why Solar Panel Installation Matters
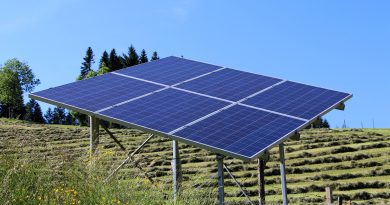
The demand for solar panel for home use in India is surging due to increasing awareness, supportive government policies, and falling equipment costs. Installing solar panels not only reduces your electricity bills but also increases the value of your property while contributing to a sustainable future.
Step-by-Step Solar Panel Installation Guide
1. Energy Needs Assessment
Before choosing any solar panel for home, calculate your average electricity consumption. Review your monthly electricity bills to determine how many units (kWh) you typically use. This will help you size your solar panel system correctly.
2. Site Inspection and Roof Evaluation
The efficiency of solar panel installation depends heavily on roof conditions. Key considerations include:
-
Orientation and tilt angle
-
Shade from nearby buildings or trees
-
Structural strength to hold panel weight
If the roof is unsuitable, explore ground-mounted or hybrid solutions.
3. Selecting the Right Solar Panel
There are several types of solar panels like monocrystalline, polycrystalline, and thin-film. For residential use, monocrystalline panels are widely considered the most efficient. Look for panels that offer:
-
High efficiency (18–22%)
-
Durable build
-
Good warranty (25 years or more)
This step is crucial in ensuring the best solar panel installation for long-term returns.
4. Choosing the Inverter and Other Components
Your inverter converts DC electricity generated by panels into usable AC power. Options include:
-
String inverters (cost-effective for unshaded areas)
-
Microinverters (suitable for roofs with shade or different orientations)
-
Hybrid inverters (support battery storage)
Don’t forget essentials like mounting structures, wiring, junction boxes, and monitoring systems.
5. Getting Government Approvals and Subsidies
In India, residential users can benefit from government subsidies of up to 40% for solar panel installation for home. You must apply through your state’s DISCOM or online portals like MNRE.
Approval generally includes:
-
Net metering setup
-
Electrical safety inspection
-
System certification
6. Installation by Professionals
Although DIY systems exist, hiring a certified installer ensures:
-
Proper mounting
-
Weatherproof wiring
-
Safe inverter and battery setup
-
Grid and net meter integration
A professional job reduces future maintenance costs and avoids warranty issues.
7. System Testing and Monitoring
After installation, technicians will test for performance, output, and safety. Monitoring systems (via app or portal) allow you to track real-time energy generation and system health.
Solar Panel Installation Tips for Success
Here are key solar panel installation tips to make your project seamless:
-
Choose a reputed installer with MNRE-approved certification and good reviews.
-
Check your roof’s condition—get repairs done if required before installing panels.
-
Opt for high-efficiency solar panels even if they cost more upfront—they perform better in limited space.
-
Keep room for expansion if you plan to add more panels in the future.
-
Schedule regular maintenance (cleaning, visual checks, etc.) to retain peak efficiency.
Mistakes to Avoid During Solar Panel Installation
Even the best solar panel installation can underperform due to simple errors:
-
Ignoring roof orientation and shading issues
-
Oversizing or undersizing the system without calculating energy needs
-
Choosing cheap components that fail early
-
Skipping on surge protectors or safety disconnects
-
Improper inverter placement in direct sunlight or damp areas
Avoid these mistakes to ensure you get the most out of your investment.
Benefits of Installing Solar Panels at Home
Once you’ve followed all the correct solar panel installation steps, here’s what you’ll enjoy:
-
Reduced electricity bills by up to 90% with net metering
-
Low maintenance—just periodic cleaning and inspection
-
Increased property value and appeal
-
Green energy with zero carbon emissions
-
Government subsidies and tax incentives
FAQs
Q1: How long does solar panel installation take?
A: Once approvals are secured, installation typically takes 1–3 days depending on system size.
Q2: What is the lifespan of a solar panel system?
A: Most solar panels last 25–30 years with minimal maintenance.
Q3: Can I install solar panels myself?
A: Technically yes, but it’s recommended to go with certified professionals to ensure safety and warranty compliance.
Q4: Is net metering available in all states?
A: Most Indian states offer net metering, but check with your local DISCOM for the latest regulations.
Q5: What maintenance do solar panels need?
A: Just clean the panels every few months and inspect for damage or dirt buildup.
Installing a solar panel for home is a long-term commitment with significant benefits—financially and environmentally. By understanding each of the solar panel installation steps and applying the right solar panel installation tips, you can ensure a hassle-free and high-performance system.
To explore trusted solar brands and get expert guidance for your installation, visit our website: solarclue.com or read more expert content at blog.solarclue.com