Can Solar Panel Charge Battery Directly?
Connecting solar panels to your RV batteries is a great way to gain energy independence while on the road. This guide will walk you through the necessary components, safety precautions, and step-by-step instructions to set up a solar system for your RV. You’ll also learn about the importance of proper sizing, panel placement, and battery bank management to ensure you get the most out of your solar investment.
Table of Contents
- 1 Choosing the Right Solar Panel System for Your RV
- 2 Mounting Solar Panels on Your RV Roof or Using Portable Panels
- 3 Installing the Charge Controller and Connecting It to Your Battery Bank
- 4 Wiring Solar Panels to the Charge Controller
- 5 Safety Precautions and Troubleshooting Tips
- 6 Battery Bank Management and Maintenance
- 7 Additional Considerations (Inverters, Fuses, Grounding)
- 8 Tips for Maximizing Solar Energy Production in RVs
- 9 Case Studies of Successful Solar Panel Installations in RVs
- 10 Table: Series vs. Parallel Solar Panel Wiring for RVs
- 11 Conclusion
- 12 FAQ Section
Choosing the Right Solar Panel System for Your RV
Types of Solar Panels:
- Monocrystalline: High efficiency, compact size, best for limited roof space.
- Polycrystalline: Slightly lower efficiency, more affordable.
- Thin-Film: Flexible, lightweight, but less efficient.
Power Requirements:
- Energy Consumption: Calculate your daily energy usage in watt-hours (Wh) to determine the size of the solar system you need.
- Panel Wattage: Choose panels with wattage ratings that match your energy needs and available space.
Example Calculation:
- Daily Usage: If your RV uses 1000 Wh per day and you have 5 peak sun hours, you’ll need around 200W of solar panels (1000 Wh / 5 hours = 200W).
Mounting Solar Panels on Your RV Roof or Using Portable Panels
Roof-Mounted Panels:
- Permanent Installation: Ideal for full-time RVers or those who frequently travel, as they provide consistent power.
- Tilt Mounts: Consider tilt mounts to optimize sun exposure, especially in winter.
Portable Panels:
- Flexibility: Portable panels can be moved to follow the sun and stored when not in use, making them ideal for part-time RVers or those who camp in shaded areas.
- Setup: Easier to set up and remove, but require manual adjustment.
Placement Considerations:
- Shading: Avoid placing panels where they might be shaded by AC units, antennas, or other roof fixtures.
- Orientation: If possible, orient panels to face south when parked to maximize sunlight exposure.
Installing the Charge Controller and Connecting It to Your Battery Bank
Purpose of the Charge Controller:
- Regulates Power: Prevents overcharging of the batteries by regulating the voltage and current from the solar panels.
- Types:
- PWM (Pulse Width Modulation): More affordable, suitable for smaller systems.
- MPPT (Maximum Power Point Tracking): More efficient, ideal for maximizing energy harvest, especially in varying sunlight conditions.
Installation Steps:
- Choose a Location: Mount the charge controller close to the battery bank to minimize voltage drop.
- Connect to Battery: Use appropriately sized wires to connect the charge controller to the positive and negative terminals of the battery bank.
- Connect to Solar Panels: Run wires from the solar panels to the charge controller, ensuring proper polarity.
Wiring Solar Panels to the Charge Controller
Series vs. Parallel Wiring:
- Series Wiring: Increases voltage, keeps current the same; ideal for MPPT charge controllers.
- Parallel Wiring: Increases current, keeps voltage the same; better for PWM charge controllers or when panel voltages must match the battery bank.
Step-by-Step Wiring:
- Connect Panels: Wire solar panels in series or parallel, depending on your system design.
- Run Wires to Controller: Use MC4 connectors to attach wires from the panels to the charge controller.
- Connect to Controller: Attach the wires to the appropriate terminals on the charge controller, ensuring correct polarity.
Safety Precautions and Troubleshooting Tips
Safety Precautions:
- Disconnect Power: Always disconnect the battery and cover the solar panels to prevent electric shock while working on the system.
- Proper Fusing: Install fuses or circuit breakers between the panels, charge controller, and battery bank to protect against short circuits.
- Use Correct Wire Gauge: Ensure the wires are thick enough to handle the current without overheating.
Troubleshooting Tips:
- No Power Output: Check all connections, fuses, and breakers; ensure the panels are not shaded or damaged.
- Overheating Wires: Use a thicker gauge wire to reduce resistance and heat buildup.
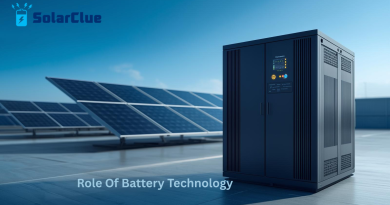
Battery Bank Management and Maintenance
Battery Types:
- Lead-Acid: Affordable, widely available, but require regular maintenance.
- AGM (Absorbent Glass Mat): Maintenance-free, more expensive, but longer lifespan.
- Lithium-Ion: High efficiency, lightweight, longer lifespan, but highest upfront cost.
Management Tips:
- Regular Monitoring: Use a battery monitor to track voltage, current, and state of charge to prevent over-discharge.
- Equalization: For lead-acid batteries, periodically equalize the charge to prevent sulfation and prolong battery life.
Maintenance:
- Check Connections: Regularly inspect and tighten all connections to ensure they are secure.
- Clean Terminals: Keep battery terminals clean and free of corrosion to maintain good electrical contact.
Additional Considerations (Inverters, Fuses, Grounding)
Inverters:
- Function: Convert DC power from the battery bank to AC power for household appliances.
- Sizing: Choose an inverter that matches your power needs and battery bank capacity.
Fuses:
- Protection: Install fuses or circuit breakers at key points (between panels, charge controller, and batteries) to prevent damage from overloads.
Grounding:
- Electrical Safety: Properly ground your solar system to protect against electrical faults and reduce the risk of shocks.
Tips for Maximizing Solar Energy Production in RVs
Optimize Panel Placement:
- Sun Tracking: If using portable panels, move them throughout the day to track the sun.
- Avoid Shading: Park in areas with full sun exposure and avoid parking under trees or near tall structures.
Energy Efficiency:
- Low-Power Devices: Use energy-efficient appliances and LED lighting to reduce overall power consumption.
- Battery Maintenance: Keep batteries well-maintained and fully charged to maximize their lifespan and efficiency.
Case Studies of Successful Solar Panel Installations in RVs
Case Study 1: Full-Time RV Living:
- Setup: 400W of monocrystalline panels, 200Ah lithium-ion battery bank, MPPT charge controller, 2000W inverter.
- Outcome: Able to run lights, fans, fridge, and small appliances without relying on shore power or a generator.
Case Study 2: Weekend Camper:
- Setup: 200W of portable solar panels, 100Ah AGM battery, PWM charge controller, 1000W inverter.
- Outcome: Provides enough power for weekend trips, powering essential devices and recharging electronics.
Table: Series vs. Parallel Solar Panel Wiring for RVs
| Aspect | Series Wiring | Parallel Wiring |
|---|---|---|
| Voltage | Increases with each panel added | Remains the same as a single panel |
| Current | Remains the same as a single panel | Increases with each panel added |
| Best Suited For | High voltage systems, long wire runs | Low voltage systems, matching battery voltage |
| Shading Impact | Affects the entire string of panels | Only affects the shaded panel |
| Compatibility | Ideal for MPPT charge controllers | Ideal for PWM charge controllers |
Conclusion
Connecting solar panels to your RV batteries is a rewarding way to power your adventures while reducing reliance on traditional energy sources. By following the steps outlined in this guide and carefully managing your solar system, you can enjoy the freedom of energy independence on the road. Whether you’re a full-time RVer or a weekend camper, a well-designed solar setup will enhance your travel experience by providing reliable, renewable power wherever you go.
FAQ Section
1. What type of solar panels are best for RVs?
Monocrystalline panels are generally the best for RVs due to their high efficiency and compact size, making them ideal for limited roof space.
2. How do I choose the right charge controller for my RV?
MPPT charge controllers are more efficient and ideal for maximizing energy harvest, especially in varying sunlight conditions. PWM controllers are more affordable and suitable for smaller systems.
3. Should I wire my solar panels in series or parallel?
If your system requires higher voltage or you’re using an MPPT charge controller, series wiring is usually better. For lower voltage systems or PWM controllers, parallel wiring is preferred.
4. How can I maximize solar energy production in my RV?
Place panels in full sun, avoid shading, and consider using a tilt mount to optimize the angle of the panels toward the sun. Additionally, use energy-efficient appliances and maintain your batteries.
5. What maintenance does an RV solar system require?
Regularly check and clean solar panels, inspect wiring and connections, monitor battery health, and ensure the charge controller is functioning properly.