Do It Yourself Home Solar Panels
As the cost of solar energy continues to decrease, more homeowners are considering DIY solar panel systems as a way to save money and gain energy independence. This comprehensive guide explores the benefits and drawbacks of DIY solar panel installation, details the components typically included in kits, and provides a step-by-step guide to help you through the installation process. We’ll also cover safety precautions, troubleshooting tips, potential challenges, and how DIY installations compare to professional setups.
Table of Contents
- 1 The Benefits and Drawbacks of DIY Solar Panel Kits
- 1.1 Components Included in Typical Kits
- 1.2 Typical Components of a DIY Solar Panel Kit
- 1.3 Tools and Equipment Needed for Installation
- 1.4 Step-by-Step Installation Guide
- 1.5 Safety Precautions and Troubleshooting Tips
- 1.6 Potential Challenges and Limitations
- 1.7 Comparing DIY Kits to Professional Installation
- 1.8 Legal and Regulatory Considerations
- 1.9 The Future of DIY Solar Panel Kits
- 1.10 Case Studies of Successful DIY Solar Panel Installations
- 1.11 Conclusion
- 1.12 Comparing DIY Solar Kits to Professional Installation
The Benefits and Drawbacks of DIY Solar Panel Kits
Benefits:
- Cost Savings: DIY solar panel kits can significantly reduce installation costs by eliminating labor fees associated with professional installation.
- Customization: DIY systems allow you to tailor the setup to your specific energy needs and preferences.
- Learning Experience: Installing your own solar system offers valuable insights into how solar energy works and the satisfaction of completing a complex project on your own.
- Potential for Off-Grid Living: DIY kits are ideal for those looking to create an off-grid power system, particularly in remote locations.
Drawbacks:
- Technical Expertise Required: Installing a solar panel system requires a good understanding of electrical systems and wiring, which may be challenging for beginners.
- Time-Consuming: DIY installations can be time-intensive, especially if you’re unfamiliar with the process.
- Limited Support: Unlike professionally installed systems, DIY kits may offer limited customer support, making troubleshooting more difficult.
- Potential for Errors: Mistakes during installation can lead to inefficiencies or safety hazards, and might void warranties.
Components Included in Typical Kits
Solar Panels:
- Description: The core of the system, solar panels convert sunlight into electricity. Kits typically include multiple panels to form an array.
Inverter:
- Function: Converts the direct current (DC) generated by the solar panels into alternating current (AC), which is used by household appliances.
Mounting Hardware:
- Purpose: Includes racks, rails, and brackets to secure the panels to the roof or ground.
Charge Controller:
- Role: Regulates the voltage and current from the solar panels to prevent overcharging the batteries, if the system includes battery storage.
Wiring and Connectors:
- Usage: Necessary for connecting the panels, inverter, and other components together to form a complete system.
Batteries (Optional):
- Storage: Batteries store excess energy generated by the solar panels for use during the night or cloudy days.
Typical Components of a DIY Solar Panel Kit
| Component | Function |
|---|---|
| Solar Panels | Convert sunlight into electricity |
| Inverter | Converts DC power to AC power for household use |
| Mounting Hardware | Secures panels to the roof or ground |
| Charge Controller | Regulates power flow to batteries (if included) |
| Wiring and Connectors | Connects system components and routes electricity |
| Batteries (Optional) | Stores excess energy for later use |
Tools and Equipment Needed for Installation
Basic Tools:
- Screwdrivers and Wrenches: For assembling and securing the mounting hardware.
- Drill: Needed for creating holes to secure the mounting hardware.
- Wire Strippers and Crimping Tools: For preparing and connecting wires.
Electrical Tools:
- Multimeter: Essential for measuring voltage, current, and resistance, and ensuring proper connections.
- Conduit Bender: Useful for bending electrical conduits to protect wiring.
Safety Gear:
- Gloves and Safety Glasses: Protect your hands and eyes during installation.
- Harness: A safety harness is crucial if working on a roof to prevent falls.
Step-by-Step Installation Guide
1. Site Assessment:
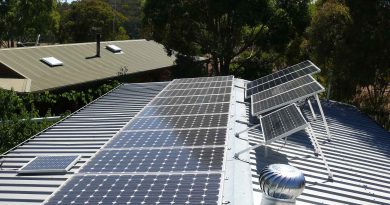
Choose the Location: Identify the best location for your solar panels, ideally a south-facing roof or an open ground area with maximum sunlight exposure.
Shade Analysis: Ensure the selected location is free from shading throughout the day.
2. Mounting the Panels:
Install Mounting Hardware: Secure the mounting hardware to the roof or ground, following the manufacturer’s instructions. Ensure it is aligned correctly for optimal panel placement.
Attach Panels: Secure the solar panels onto the mounting hardware.
3. Wiring the System:
Connect Solar Panels: Use the provided wiring and connectors to link the solar panels together in series or parallel, depending on the system design.
Inverter Connection: Run the DC wiring from the solar panels to the inverter, ensuring the polarity is correct.
4. Installing the Inverter and Charge Controller:
Mount the Inverter: Install the inverter in a location that is dry, well-ventilated, and close to the solar panels.
Connect to the Grid or Battery: If connecting to the grid, follow local codes and regulations. For off-grid systems, connect the inverter to the battery storage system.
5. Testing and Commissioning:
Check Connections: Use a multimeter to verify that all electrical connections are correct and secure.
Power On: Turn on the system and monitor the inverter to ensure it’s operating correctly and efficiently.
Final Checks:
Inspection: Inspect all components for secure installation, proper connections, and absence of any loose or exposed wires.
System Monitoring: Use the monitoring tools provided by the inverter to check the system’s performance.
Safety Precautions and Troubleshooting Tips
Safety Precautions:
- Turn Off Power: Always turn off the power before working on any electrical components to avoid electric shock.
- Use a Harness: If working on a roof, always wear a safety harness to prevent falls.
- Avoid Installation in Poor Weather: Do not attempt installation during rain or high winds to reduce the risk of accidents.
Troubleshooting Tips:
- No Power Output: Double-check all wiring connections and ensure the inverter is properly connected and powered on.
- Low Power Output: Inspect the panels for shading, dirt, or debris, and clean them if necessary. Also, check for proper alignment and tilt.
- Inverter Issues: Refer to the inverter’s manual for specific error codes or issues. If unresolved, contact the manufacturer’s support.
Potential Challenges and Limitations
System Sizing:
- Challenge: Accurately sizing the system for your energy needs can be complex, particularly for those without experience.
- Solution: Use online solar calculators or consult with a professional to determine the correct system size.
Permitting and Regulations:
- Challenge: Navigating local permitting requirements and building codes can be difficult for first-time installers.
- Solution: Contact your local building authority before starting the project to understand the necessary permits and inspections.
Grid Connection:
- Challenge: Connecting your DIY solar system to the grid requires approval from your utility company, which may involve additional paperwork and inspections.
- Solution: Work with your utility company early in the process to ensure a smooth grid connection.
Comparing DIY Kits to Professional Installation
Cost:
- DIY Kits: Generally lower in cost due to the absence of labor fees. However, potential savings must be weighed against the time and skill required.
- Professional Installation: Higher upfront costs but typically includes better warranties, support, and guarantees that the system meets local codes.
Time:
- DIY Kits: Installation can be time-consuming, particularly for those new to solar systems.
- Professional Installation: Faster installation by experienced technicians, with minimal risk of errors.
Support and Warranty:
- DIY Kits: Limited support and warranties may vary. DIY installers are responsible for addressing any issues that arise.
- Professional Installation: Typically includes comprehensive support and longer warranties, with service provided for any issues that may occur.
Legal and Regulatory Considerations
Permits:
- Requirement: Most localities require permits for solar installations. Ensure you have the necessary permits before beginning the installation.
Grid Connection:
- Interconnection Agreement: If connecting to the grid, you’ll need an interconnection agreement with your utility company, which outlines the terms and conditions for feeding electricity back into the grid.
The Future of DIY Solar Panel Kits
Technological Advances:
- Improved Components: Future DIY kits may include more advanced, plug-and-play components, making installation easier for the average homeowner.
- Better Customer Support: Companies may offer enhanced virtual support and detailed video guides to assist DIY installers.
Market Trends:
- Increasing Demand: As more homeowners seek energy independence and the cost of solar technology decreases, the demand for DIY solar kits is expected to grow.
Case Studies of Successful DIY Solar Panel Installations
Case Study 1: Suburban Home:
- Location: Dallas, TX
- System: 6 kW grid-tied solar panel system
- Outcome: The homeowner successfully installed the system over several weekends, reducing their electricity bill by 80% and increasing their home’s resale value.
Case Study 2: Off-Grid Cabin:
- Location: Northern California
- System: 3 kW off-grid solar system with battery storage
- Outcome: The DIY system provided reliable power to the remote cabin, allowing for year-round living without reliance on external electricity sources.
Conclusion
Building your own solar panel system is a rewarding way to achieve energy independence and reduce your electricity bills. However, it requires careful planning, technical knowledge, and adherence to safety standards. By following this comprehensive guide, you can successfully navigate the complexities of DIY solar installation and create a system that meets your energy needs. Whether you’re looking to go off-grid or simply reduce your reliance on the grid, DIY solar panel kits offer a flexible and cost-effective solution for harnessing the power of the sun.
Comparing DIY Solar Kits to Professional Installation
| Aspect | DIY Solar Kits | Professional Installation |
|---|---|---|
| Cost | Lower upfront cost, no labor fees | Higher cost due to labor and potentially higher quality components |
| Installation Time | Time-consuming, especially for beginners | Faster installation by experienced professionals |
| Technical Skill Required | Moderate to high, depending on kit complexity | Minimal skill required by the homeowner |
| Support and Warranty | Limited support, warranties may vary | Comprehensive support and longer warranties |
| Permitting and Grid Connection | Homeowner responsibility | Handled by professionals, ensuring compliance |
Here at SolarClue®, we offer a smart, practical, and “beautiful” solution. You will be answered for all the questions related to Solar.
We provide all kinds of brands that are the Best Solar panels in India.
If you are the one who is planning for the solar power system. Don’t hesitate to contact our team!
Looking forward to empowering you with solar energy, just like hundreds of our other clients!


