How to Install a Solar UPS at Home: A Step-by-Step Guide
Hey there! Have you ever thought about using solar power to keep your home running smoothly, even when there’s a power outage? With a Solar UPS (Uninterruptible Power Supply), you can do just that! It’s a great way to save on electricity bills and be kinder to the environment. In this guide, we’ll walk you through the process of installing a Solar UPS at home in simple, easy-to-follow steps. Let’s get started on this exciting journey towards energy independence!
Table of Contents
- 1 What is a Solar UPS?
- 1.1 Why Install a Solar UPS?
- 1.2 What You’ll Need
- 1.3 Step 1: Assess Your Energy Needs
- 1.4 Step 2: Choose the Right Solar Panels
- 1.5 Step 3: Select the Batteries
- 1.6 Step 4: Install the Mounting System
- 1.7 Step 5: Mount the Solar Panels
- 1.8 Step 6: Wire the Solar Panels
- 1.9 Step 7: Install the Charge Controller
- 1.10 Step 8: Install the Batteries
- 1.11 Step 9: Install the Inverter
- 1.12 Step 10: Test the System
- 1.13 Step 11: Monitor and Maintain
What is a Solar UPS?
Before we dive into the installation steps, let’s understand what a Solar UPS is. A Solar UPS is a system that combines solar panels, batteries, and an inverter to provide backup power during outages. It stores energy from the sun and uses it to keep your appliances running when the grid power is down.
Why Install a Solar UPS?
1.Energy Savings: Reduce your electricity bills by using solar power.
2.Backup Power: Ensure continuous power supply during outages.
3.Environmentally Friendly: Use clean, renewable energy from the sun.
4.Energy Independence: Decrease reliance on the grid and potential power cuts.
What You’ll Need
1.Solar Panels: To capture solar energy.
2.Charge Controller: To regulate the power going to the batteries.
3.Batteries: To store the solar energy.
4.Inverter: To convert stored energy from DC to AC for home use.
5.Mounting Equipment: To secure solar panels on the roof.
6.Cables and Connectors: To connect all components.
7.Tools: Screwdrivers, wrenches, drill, etc.
8.Safety Gear: Gloves, goggles, and safety harness if working on the roof.
Step-by-Step Installation Guide
Step 1: Assess Your Energy Needs
Start by understanding how much energy your home uses. Look at your electricity bills to determine your average daily usage in kilowatt-hours (kWh). This helps in deciding the number of solar panels and battery capacity you need.
Step 2: Choose the Right Solar Panels
Solar panels come in different types and efficiencies. Choose panels that fit your energy needs and budget. Additionally, you’ll need to decide on the number of panels based on the space available on your roof and the amount of sunlight your location receives.
Step 3: Select the Batteries
Batteries store the solar energy for use when the sun isn’t shining or during power outages. There are different types of batteries like lead-acid, lithium-ion, etc. Lithium-ion batteries are more efficient and have a longer lifespan, though they can be more expensive.
Step 4: Install the Mounting System
The mounting system holds your solar panels in place on the roof. It’s crucial to install this correctly to ensure the panels are secure and positioned to receive maximum sunlight. Here’s how to do it:
1.Mark the Installation Area: Identify where you want to place the panels on your roof.
2.Install the Mounts: Secure the mounts to the roof rafters using screws.
3.Attach the Rails: Fix the rails to the mounts. These rails will hold the panels.
Step 5: Mount the Solar Panels
Once the mounting system is in place, it’s then time to attach the solar panels.
1.Lift the Panels: Carefully lift the panels onto the roof.
2.Secure the Panels: Attach the panels to the rails using clamps.
3.Check the Angles: Ensure the panels are tilted correctly to capture the most sunlight.
Step 6: Wire the Solar Panels
Now, you need to connect the solar panels together to form a solar array. Use appropriate cables and connectors to wire the panels. This involves:
1.Series or Parallel Wiring: Decide whether to wire the panels in series (increases voltage) or parallel (increases current) based on your system’s requirements.
2.Connect the Panels: Use MC4 connectors to join the panels.
Step 7: Install the Charge Controller
The charge controller regulates the power going from the solar panels to the batteries, preventing overcharging. Here’s how to install it:
1.Mount the Controller: Choose a suitable place near the batteries and mount the controller on the wall.
2.Connect to Panels: Wire the controller to the solar panels.
3.Connect to Batteries: Wire the controller to the batteries.
Step 8: Install the Batteries
Batteries should be placed in a well-ventilated, dry area. Here’s the process:
1.Position the Batteries: Place the batteries on a sturdy surface.
2.Connect the Batteries: Use cables to connect the batteries to each other (if using multiple batteries) and to the charge controller.
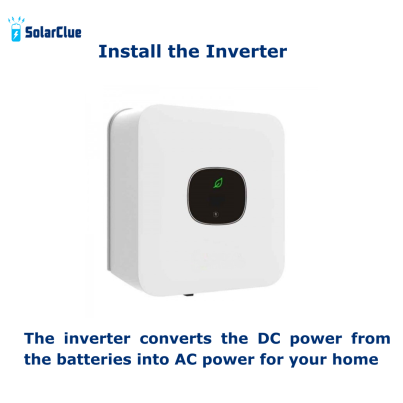
Step 9: Install the Inverter
The inverter converts the DC power from the batteries into AC power for your home. Here’s how to install it:
1.Mount the Inverter: Choose a location near the batteries and mount the inverter on the wall.
2.Connect to Batteries: Wire the inverter to the batteries.
3.Connect to Home’s Electrical System: Connect the inverter to your home’s main electrical panel.
Step 10: Test the System
Before you start using your Solar UPS, it’s essential to test the system to ensure, first and foremost, that everything is working correctly.
1.Check Connections: Make sure all connections are secure.
2.Test the Panels: Ensure the panels are generating power.
3.Check the Charge Controller: Verify that the controller is regulating power correctly.
4.Test the Batteries: Check that the batteries are storing energy.
5.Test the Inverter: Ensure the inverter is converting DC to AC power properly.
Step 11: Monitor and Maintain
Once your Solar UPS is up and running, regular monitoring and maintenance will, consequently, keep it functioning efficiently.
1.Monitor Performance: Keep an eye on the system’s performance using a monitoring app or device.
2.Clean the Panels: Regularly clean the solar panels to remove dust and debris.
3.Check Battery Health: Periodically check the health of your batteries and replace them if needed.
4.Inspect Wiring and Connections: Regularly inspect all wiring and connections for any signs of wear or damage.
Conclusion
And there you have it – your very own Solar UPS installation! By following these steps, you’re not just setting up a backup power system; moreover, you’re taking a big step towards a more sustainable and energy-independent lifestyle. Installing a Solar UPS might seem like a difficult task; however, with a little effort and the right tools, it’s entirely doable. Plus, the benefits of using clean, renewable energy make it all worthwhile. Therefore, get started on your solar journey today, and enjoy the peace of mind that comes with having a reliable backup power source. Happy installing!
Visit SolarClue® to see the best Solar Inverter. SolarClue® actively sells solar energy products at discounts of up to 50% on its online marketplace.