How To Install Solar Panels On Roof?
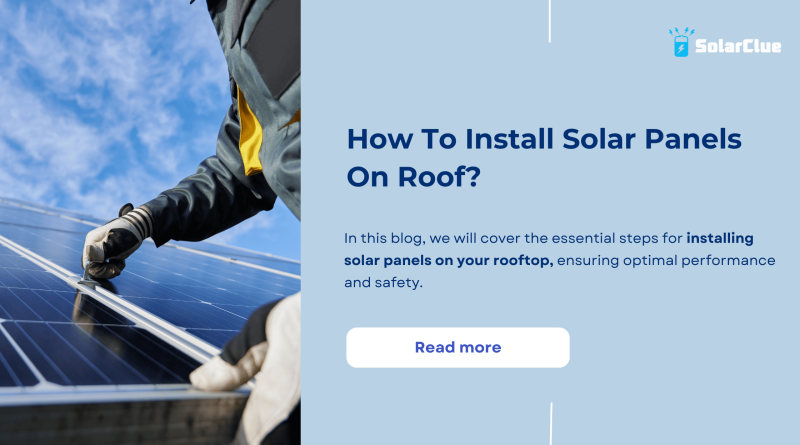
Solar energy is a sustainable and cost-effective solution for residential power needs. This blog will cover the essential steps for installing solar panels on your rooftop, ensuring optimal performance and safety.
Table of Contents
- 1 Understanding Solar Panel System Components
- 1.0.1 Obtaining Necessary Permits and Approvals
- 1.0.2 Roof Assessment and Preparation
- 1.0.3 System Sizing and Panel Orientation
- 1.0.4 Mounting and Securing Solar Panels
- 1.0.5 Electrical Wiring and Inverter Installation
- 1.0.6 System Testing and Commissioning
- 1.0.7 Maintenance and Monitoring of Solar Panels
- 1.0.8 Troubleshooting Common Installation Problems
- 1.0.9 Safety Guidelines for Rooftop Installations
- 1.1 System Sizing Example
- 1.2 FAQs
Understanding Solar Panel System Components
A typical solar panel system includes:
Solar Panels: Convert sunlight into electricity.
Inverter: Converts DC electricity from panels to AC for home use.
Mounting System: Secures panels to the roof.
Batteries (optional): Store excess energy for later use.
Monitoring System: Tracks energy production and usage.
Obtaining Necessary Permits and Approvals
Before installing solar panels, you need to obtain the necessary permits and approvals:
Local Regulations: Check building codes and zoning laws.
Permitting Process: Submit plans and applications to local authorities.
Utility Approvals: Ensure compatibility with the grid and net metering agreements.
HOA Considerations: Obtain approvals if required by your homeowners association.
Roof Assessment and Preparation
To ensure your roof is suitable for solar panels:
Roof Suitability: Check the age, condition, and material of your roof.
Roof Space and Orientation: Assess available space and the direction your roof faces.
Load-Bearing Capacity: Ensure your roof can support the weight of the panels.
Preparation Steps: Repair or reinforce the roof as needed.
System Sizing and Panel Orientation
Proper system sizing and panel orientation are crucial:
Energy Needs: Calculate your household’s energy consumption.
Number of Panels: Determine the number of panels needed to meet your energy requirements.
Orientation and Tilt Angle: Position panels to maximize sun exposure.
Shading Analysis: Identify and mitigate potential shading issues.
Mounting and Securing Solar Panels
Installing the panels involves:
Mounting Systems: Choose between fixed, adjustable, or tracking mounts.
Mounting Brackets: Install brackets securely on the roof.
Securing Panels: Attach panels to the brackets.
Weatherproofing: Seal and protect against weather elements.
Electrical Wiring and Inverter Installation
Connecting the panels to your home’s electrical system involves:
Series or Parallel: Decide on series or parallel connections for your panels.
Conduit and Wiring: Run conduit and wiring from panels to the inverter.
Inverter Installation: Install the inverter near your main electrical panel.
Grid/Battery Connection: Connect to the grid or battery storage system.
System Testing and Commissioning
Before activating your system:
Pre-Commissioning Checks: Inspect all components and connections.
Testing Components: Test the inverter, panels, and electrical connections.
Monitoring Performance: Use monitoring systems to track initial performance.
Final Activation: Activate the system and start generating power.
Maintenance and Monitoring of Solar Panels
To ensure long-term performance:
Regular Cleaning: Clean panels to remove dust and debris.
Inspections: Conduct regular inspections for damage or wear.
Monitoring Performance: Use monitoring tools to track performance.
Maintenance Plans: Develop a long-term maintenance plan.
Troubleshooting Common Installation Problems
Addressing common issues involves:
Low Power Output: Check for shading, dirt, or panel damage.
Inverter Problems: Inspect connections and inverter settings.
Diagnostic Steps: Follow systematic steps to identify issues.
Professional Help: Know when to call a professional for assistance.
Safety Guidelines for Rooftop Installations
Ensure safety during installation:
Safety Precautions: Follow general safety guidelines.
Safety Equipment: Use harnesses, helmets, and other protective gear.
Electrical Safety: Handle electrical components carefully.
Emergency Procedures: Have a plan for emergencies.
System Sizing Example
| Parameter | Value |
|---|---|
| Average Daily Energy Use | 30 kWh |
| Peak Sun Hours per Day | 5 hours |
| Panel Efficiency | 18% |
| Average Panel Wattage | 300 W |
| Number of Panels Required | 20 panels |
| Roof Area Required | 40 m² |
| Estimated System Cost | ₹4,50,000 |
| Estimated Annual Savings | ₹60,000 |
| Payback Period | 7.5 years |
Conclusion
Installing solar panels on your residential rooftop involves careful planning, obtaining the necessary permits, and following precise installation steps. By understanding the system components, ensuring roof suitability, and adhering to safety guidelines, you can achieve a successful solar installation that maximizes energy production and savings.
Here at SolarClue®, we offer a smart, practical, and “beautiful” solution. You will be answered for all the questions related to Solar.
We provide all kinds of brands that are the Best Solar panels in India.
If you are the one who is planning for the solar power system. Don’t hesitate to contact our team!
Looking forward to empowering you with solar energy, just like hundreds of our other clients!
FAQs
1. What are the key components of a solar panel system?
Solar panels, inverter, mounting system, batteries (optional), and monitoring system.
2. Do I need permits to install solar panels?
Yes, you need to obtain local permits, utility company approvals, and possibly HOA approvals.
3. How do I determine if my roof is suitable for solar panels?
Assess the roof’s age, condition, material, available space, orientation, and load-bearing capacity.
4. What maintenance is required for solar panels?
Regular cleaning, inspections, and monitoring of performance.
5. What should I do if my solar system isn’t performing as expected?
Perform diagnostic checks for shading, dirt, panel damage, or inverter issues, and seek professional help if necessary.


