Inverter Connection In home
Hey there! Today, let’s talk about a practical aspect of electricity in homes: connecting an inverter. It might sound technical, but we’ll break it down in simple terms so you can understand how it works and why it’s important.
Table of Contents
- 1 Inverters: What They Do ?
- 1.1 Types of Inverters for Homes
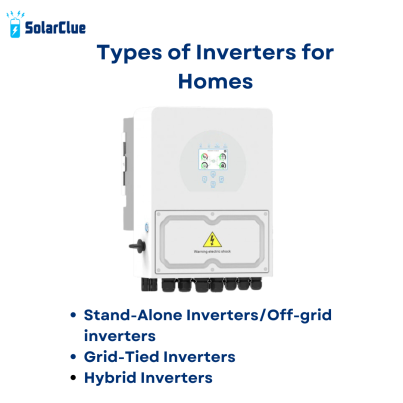
- 1.1.1 1.Stand-Alone Inverters: These are basic inverters that are typically used for backup power. They are connected directly to batteries and provide AC power when needed.
- 1.1.2 2.Grid-Tied Inverters: These inverters are connected to both the electrical grid and a solar power system. They manage the flow of electricity between the solar panels, batteries (if present), and the grid. They can also feed excess electricity generated by solar panels back into the grid.
- 1.1.3 3.Hybrid Inverters: As the name suggests, hybrid inverters combine features of both stand-alone and grid-tied inverters. They can operate off-grid like stand-alone inverters or interact with the grid and manage battery storage like grid-tied inverters.
- 1.1.4 Steps to Connect an Inverter in Your Home
- 1.1 Types of Inverters for Homes
Inverters: What They Do ?
First things first, what exactly does an inverter do? In simple terms, an inverter is a device that converts direct current (DC) electricity into alternating current (AC) electricity. Why does this matter? Well, most of our household appliances—from TVs to refrigerators—run on AC power. But batteries and some other power sources produce DC power. That’s where the inverter steps in to bridge the gap.

Types of Inverters for Homes
Before we dive into how to connect an inverter, let’s quickly touch on the types you might encounter:
1.Stand-Alone Inverters: These are basic inverters that are typically used for backup power. They are connected directly to batteries and provide AC power when needed.
2.Grid-Tied Inverters: These inverters are connected to both the electrical grid and a solar power system. They manage the flow of electricity between the solar panels, batteries (if present), and the grid. They can also feed excess electricity generated by solar panels back into the grid.
3.Hybrid Inverters: As the name suggests, hybrid inverters combine features of both stand-alone and grid-tied inverters. They can operate off-grid like stand-alone inverters or interact with the grid and manage battery storage like grid-tied inverters.
Steps to Connect an Inverter in Your Home
Now, let’s get into the core of connecting an inverter in your home. We’ll outline the general steps involved, keeping it straightforward and easy to follow.
Step 1: Choose the Right Location
Decide where you want to install your inverter. It should be in a well-ventilated area away from direct sunlight and moisture. This could be in a utility room, garage, or even outdoors in a weatherproof enclosure.
Step 2: Install the Batteries (If Required)
If you’re using a stand-alone inverter or a hybrid inverter with battery backup, you’ll need to install the batteries first. Follow the manufacturer’s instructions for battery installation and ensure they are securely connected.
Step 3: Mount the Inverter
Securely mount the inverter in the chosen location using appropriate brackets or mounts. Ensure it is positioned correctly and accessible for maintenance and ventilation as per the manufacturer’s guidelines.
Step 4: Connect DC Input
If you’re using batteries or solar panels to power the inverter, connect the DC input terminals of the inverter to the positive and negative terminals of the battery bank or solar array. Pay attention to polarity—positive to positive and negative to negative.
Step 5: Connect AC Output
Next, connect the AC output terminals of the inverter to your home’s electrical system. This is typically done through a transfer switch or breaker panel. Ensure the connections are secure and follow local electrical codes for safety.
Step 6: Check Connections and Power Up
Double-check all connections to ensure they are tight and secure. Once everything is in place, you can power up the inverter. Follow the manufacturer’s instructions for powering on and initializing the inverter.
Step 7: Test and Monitor
After powering up, test the inverter by turning on a few appliances to ensure they receive power from the inverter. Monitor the performance and ensure everything is functioning correctly.
Conclusion: Bringing It All Together
Connecting an inverter in your home doesn’t have to be difficult task. With the right knowledge and steps, you can safely and effectively integrate this device into your household electricity setup. Whether you’re looking for backup power during outages or harnessing solar energy, an inverter plays a crucial role. Specifically, it ensures that your appliances run smoothly.
So, next time you flip a switch and your lights come on or your favorite TV show starts playing, remember the journey that electricity took. Specifically, it transforms from DC to AC, thanks to your trusty inverter. It’s a small yet significant piece of technology that makes modern living a whole lot easier.
Here’s to powering up your home with confidence and understanding. Cheers to the magic of inverters!
Visit SolarClue® to see the best Solar Inverter. SolarClue® actively sells solar energy products at discounts of up to 50% on its online marketplace.


