Step-by-Step Guide to Installing Solar Panels
With the growing need for clean and renewable energy, solar power has emerged as one of the most reliable solutions. Installing a solar power system at home or for your business not only reduces electricity bills but also contributes to environmental sustainability. However, many people are often confused about how solar panel installation actually works. This step-by-step guide will help you understand the process, the equipment required, and how you can make the most of your solar energy investment.
Table of Contents
- 1 Why Choose Solar Power?
- 1.1 Step 1: Assess Your Energy Needs
- 1.2 Step 2: Site Evaluation and Roof Inspection
- 1.3 Step 3: Choosing the Right Solar Panel and Inverter
- 1.4 Step 4: Designing the Solar Power System
- 1.5
- 1.6 Step 5: Installing the Mounting Structure
- 1.7 Step 6: Installing Solar Panels
- 1.8 Step 7: Electrical Wiring and Inverter Setup
- 1.9 Step 8: Testing and Commissioning
- 1.10 Step 9: Connecting to the Grid or Battery Storage
- 1.11 Step 10: Maintenance and Monitoring
- 2 Benefits of Solar Panel Installation
- 3 FAQs
- 4 Conclusion
Why Choose Solar Power?
Switching to solar power is no longer just a trend but a smart investment. It provides long-term financial savings, reduces dependency on fossil fuels, and ensures energy security. Modern solar panels are durable, efficient, and designed to work even in varying weather conditions. With government subsidies and incentives, now is the perfect time to invest in a solar power system.
Step 1: Assess Your Energy Needs
Before purchasing a solar panel, you need to calculate your average electricity consumption. Analyze past utility bills to determine daily and monthly usage. This will help you decide how many panels and what capacity of solar power system you need. A household with higher consumption will require more panels compared to a small apartment.
Step 2: Site Evaluation and Roof Inspection
A crucial step in solar panel installation is evaluating whether your roof can support the panels. Factors to check include:
-
Roof orientation and angle
-
Structural strength
-
Shading from trees or nearby buildings
-
Available roof space
A professional installer usually conducts this survey to ensure maximum efficiency from your solar energy system.
Step 3: Choosing the Right Solar Panel and Inverter
Selecting the right type of solar panel is essential. The two most common types are:
-
Monocrystalline panels: High efficiency and long lifespan
-
Polycrystalline panels: Cost-effective with good performance
Along with panels, you’ll need an inverter that converts DC power from the panels into usable AC power. The type of inverter you choose directly affects the performance of your solar power system.
Step 4: Designing the Solar Power System
Once you know your energy requirements and roof specifications, the next step is designing the layout of the solar panel installation. Proper system design ensures:
-
Correct placement of each solar panel
-
Optimized angle for maximum sunlight absorption
-
Accurate sizing of the inverter and batteries (if needed)
This stage also involves compliance with local government regulations and permissions for installing a solar power system.
Step 5: Installing the Mounting Structure
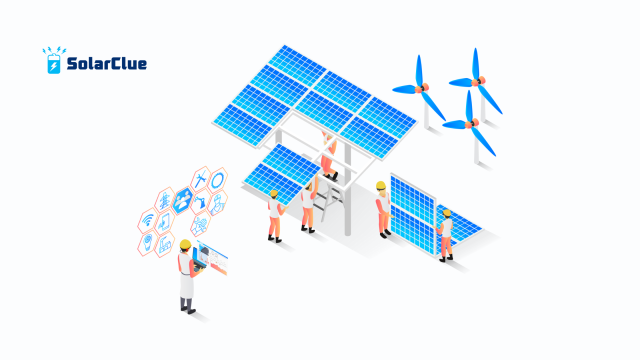
The mounting structure provides stability and durability to your solar panels. Typically made from aluminum or steel, it ensures the correct tilt angle for maximum solar energy generation. Properly installed mounts protect panels from wind, rain, and other environmental factors.
Step 6: Installing Solar Panels
Once the mounting structure is ready, the solar panel installation process begins. Each panel is carefully placed and fixed onto the mounting structure. Proper wiring is then connected to ensure safe and efficient energy transfer. At this stage, it is essential to use high-quality connectors and cables to avoid energy losses.
Step 7: Electrical Wiring and Inverter Setup
The solar power system needs proper electrical wiring to function efficiently. The panels are connected to the inverter, which then links to your home’s electrical system. Safety measures, such as fuses and circuit breakers, are installed to prevent overloads. Once completed, the system can supply solar energy directly to your home.
Step 8: Testing and Commissioning
After installation, the system undergoes thorough testing. Engineers ensure that each solar panel is functioning properly, the inverter is working efficiently, and the entire system is generating the expected amount of solar power. Commissioning includes monitoring performance and making necessary adjustments.
Step 9: Connecting to the Grid or Battery Storage
Depending on the type of solar power system you choose, your installation can be connected to the grid or paired with batteries.
-
Grid-tied system: Excess electricity is fed into the power grid, and you receive credits through net metering.
-
Off-grid system: Batteries store surplus solar energy for later use.
This step ensures energy independence and maximum utilization of solar power.
Step 10: Maintenance and Monitoring
Proper maintenance extends the lifespan of your solar panels. Key practices include:
-
Regular cleaning to remove dust and debris
-
Periodic inspection of wiring and inverters
-
Using monitoring apps to track solar energy production
Most solar power systems come with warranties ranging from 10 to 25 years, making them a long-term investment.
Benefits of Solar Panel Installation
-
Reduces electricity bills significantly
-
Increases property value
-
Contributes to environmental protection
-
Provides energy security
-
Low maintenance requirements
By following this step-by-step guide to installing solar panels, you can make an informed decision and maximize the benefits of solar energy.
FAQs
1. How long does solar panel installation take?
Typically, installing a solar power system takes 1 to 3 days depending on the size of the system and site conditions.
2. Do solar panels work during cloudy days?
Yes, solar panels still generate electricity during cloudy days, though efficiency may be slightly reduced.
3. What is the lifespan of a solar panel?
Most high-quality solar panels last between 25 to 30 years with proper maintenance.
4. Can I install solar panels myself?
While DIY kits are available, professional solar panel installation ensures safety, efficiency, and compliance with regulations.
5. Is a solar power system worth the investment?
Absolutely. With reduced electricity bills, government incentives, and long-term durability, a solar power system pays for itself within a few years.
Conclusion
Switching to solar power is not only a smart financial move but also a step toward a sustainable future. This step-by-step guide to installing solar panels provides everything you need to know to start your journey toward clean energy. If you are ready to make the switch and explore the best options for your home or business, visit solarclue.com or read more insights at blog.solarclue.com and let your journey to sustainable energy begin today.

