Step-by-Step Guide to Installing Solar Panels at Home
Switching to solar power is a smart investment that reduces electricity bills, supports sustainability, and increases your property value. Whether you want to cut costs or embrace clean energy, understanding the process of installing solar panels at home is crucial. This guide will walk you through every step, from planning to enjoying your first day of solar-generated electricity.
Table of Contents
- 1 Why Choose a Solar Power System for Your Home?
- 1.1 Step 1: Assess Your Home’s Solar Potential
- 1.2 Step 2: Understand Your Energy Needs
- 1.3 Step 3: Choose the Right Solar Panel Type
- 1.4 Step 4: Select a Reliable Solar Installer
- 1.5 Step 5: Get Permits and Apply for Incentives
- 1.6 Step 6: Install Mounting Structures
- 1.7 Step 7: Install the Solar Panels
- 1.8 Step 8: Electrical Wiring and Inverter Setup
- 2 Step 9: Connect to the Grid or Battery System
- 3 Maintenance Tips for Long-Term Performance
- 4 FAQs on Installing Solar Panels at Home
- 5 Final Thought:
Why Choose a Solar Power System for Your Home?
A solar power system converts sunlight into electricity, offering long-term savings and reducing dependence on the grid. Installing a solar panel for home is not just about going green—it’s about gaining energy independence and securing a sustainable future. With government incentives and falling solar technology costs, solar panel installation is more accessible than ever.
Step 1: Assess Your Home’s Solar Potential
Before investing in a solar panel, you must evaluate your home’s suitability:
-
Roof orientation & angle: South-facing roofs in India get the most sunlight.
-
Shading: Trees, nearby buildings, or chimneys can reduce efficiency.
-
Roof condition: Ensure it’s strong enough to support a solar array for decades.
You can use online tools or hire a solar surveyor to determine how well your location can support solar power production.
Step 2: Understand Your Energy Needs
Check your electricity bills for the last 12 months to find your average daily and monthly energy consumption. This helps you decide how many solar panels for home you’ll need and the size of the solar power system that best fits your requirements.
Step 3: Choose the Right Solar Panel Type
The market offers different solar panel options:
-
Monocrystalline panels: High efficiency, compact size, longer lifespan.
-
Polycrystalline panels: More affordable, slightly less efficient.
-
Thin-film panels: Flexible, lightweight, but lower efficiency.
Your choice will depend on budget, roof space, and efficiency goals.
Step 4: Select a Reliable Solar Installer
Choosing the right installer is one of the most important steps in solar panel installation. Look for:
-
Certifications and experience in residential solar projects.
-
Good customer reviews and after-sales service.
-
Warranty terms for panels, inverters, and installation.
Step 5: Get Permits and Apply for Incentives
In India, certain state governments and DISCOMs offer subsidies for solar power system installations. You may also need permits for grid connection and net metering. Your installer will typically handle these applications.
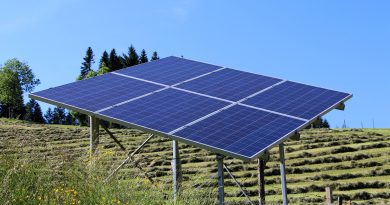
Step 6: Install Mounting Structures
The mounting system ensures your solar panel is positioned at the best angle for maximum sunlight exposure. For most homes, a tilt equal to the latitude of your location provides optimal year-round efficiency.
Step 7: Install the Solar Panels
Once the mounts are in place, your installer will secure each solar panel for home onto the framework. Proper alignment and secure fastening are critical for durability and performance.
Step 8: Electrical Wiring and Inverter Setup
The wiring connects your solar power system to the inverter, which converts DC electricity from the panels into AC electricity for household use. Installers follow strict safety standards to prevent faults and ensure optimal performance.
Step 9: Connect to the Grid or Battery System
You can choose between:
-
Grid-tied system: Excess electricity is sent to the grid, and you get credits through net metering.
-
Off-grid system: Uses batteries to store electricity for later use.
-
Hybrid system: Combines both for maximum flexibility.
Step 10: Inspection and Activation
Before your system goes live, local authorities or utility companies may inspect it to ensure compliance with safety and performance standards. Once approved, your solar power system can be switched on.
Maintenance Tips for Long-Term Performance
-
Clean your solar panel surface every 3–6 months.
-
Check for shading or dirt build-up.
-
Monitor energy output regularly.
-
Schedule annual professional inspections.
FAQs on Installing Solar Panels at Home
Q1: How long does it take to complete solar panel installation?
Most residential solar panel installation projects take 1–3 days after permits are approved.
Q2: Can I install a solar panel myself?
DIY is possible but not recommended. Professional installation ensures safety, efficiency, and warranty validity.
Q3: How much does a solar power system cost in India?
Prices vary depending on capacity, type of solar panel, and installation complexity. On average, a 3kW system can cost ₹1.5–2 lakh before subsidies.
Q4: Will solar panels work during power cuts?
Grid-tied systems shut down during outages for safety. To have backup power, opt for a hybrid system with batteries.
Final Thought:
Installing solar panels at home is a smart decision that pays for itself over time while reducing your carbon footprint. If you’re ready to take the first step towards clean energy and lower bills, explore our expert resources at solarclue.com and blog.solarclue.com today—you might be just one installation away from transforming your home’s energy future.