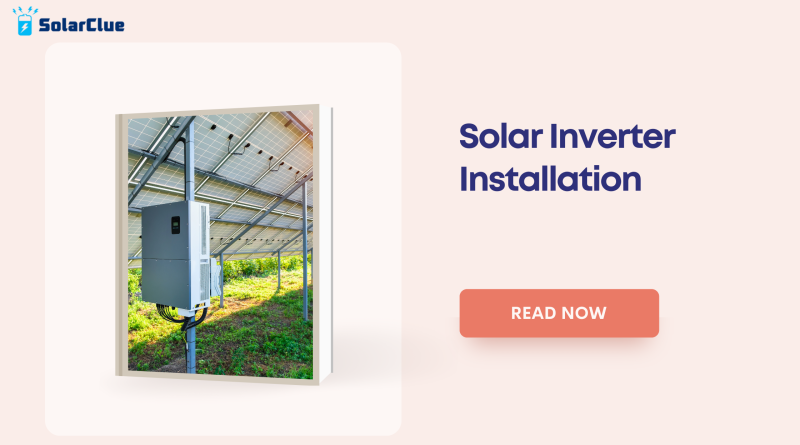
Solar Inverter Installation
Have you ever thought about how much sunshine we get every day? It’s a lot, right? Now, imagine if you could harness all that sunshine to power your home. Sounds like a win-win, doesn’t it? That’s where solar inverters come into play. They are the heroes that transform sunlight into usable electricity. If you’re considering installing a solar inverter, but the technical stuff makes your head spin, don’t worry. This guide is here to walk you through the basics in simple terms, making the whole process feel like a breeze.
Table of Contents
What Is a Solar Inverter and Why Do You Need One?
Before diving into the installation, let’s first understand what a solar inverter is. Think of it as the middleman between your solar panels and your home’s electrical system. Solar panels collect sunlight and convert it into direct current (DC) electricity. However, most of our home appliances run on alternating current (AC). This is where the solar inverter steps in—it converts the DC electricity from the panels into AC electricity that you can use in your home.
So, why do you need a solar inverter? Simply put, without it, your solar panels would be practically useless for powering your home. The inverter ensures that the energy harnessed by your solar panels is converted into a form that can actually power your lights, appliances, and everything else.
Types of Solar Inverters
There are a few different types of solar inverters available, and choosing the right one depends on your specific needs and setup.
- String Inverters: These are the most common and affordable types of inverters. In a string inverter system, solar panels are connected in series (a string), and the combined DC output is sent to a single inverter. The inverter then converts it into AC electricity. The downside is that if one panel underperforms (e.g., due to shade), the performance of the entire string is affected.
- Microinverters: These are installed on each solar panel individually. Each microinverter converts the DC electricity to AC right at the panel. This means that if one panel isn’t performing well, it won’t drag down the performance of the others. Microinverters are more expensive than string inverters but offer better performance monitoring and efficiency.
- Hybrid Inverters: These combine the functions of a standard inverter with a battery inverter. They allow you to store excess energy in batteries for use when the sun isn’t shining, giving you more control over your energy use.
- Central Inverters: Typically used in large commercial installations, these inverters handle large quantities of power. They work similarly to string inverters but on a much larger scale.
Planning Your Solar Inverter Installation
Now that you understand what a solar inverter is and the different types available, let’s move on to the installation process. Proper planning is crucial for a successful installation, and it’s best to consider a few key factors:
- Assess Your Energy Needs: Start by determining how much electricity your home consumes. This will help you choose the right size for your solar inverter and system. Look at your past electricity bills to get an idea of your average monthly usage.
- Evaluate Your Roof Space: The amount of roof space you have will dictate how many solar panels you can install, which in turn affects the size of your inverter. Make sure your roof is in good condition and can support the weight of the panels.
- Check Local Regulations and Incentives: Different regions have varying regulations regarding solar installations. Additionally, there might be government incentives or rebates available that can reduce the cost of your installation. Make sure you’re aware of these before proceeding.
- Select the Right Components: Aside from the inverter, you’ll need to choose the right solar panels, mounting system, and possibly a battery. Work with a reputable installer who can recommend quality components that match your budget and energy needs.
The Installation Process
The installation of a solar inverter and panels is a task that should be handled by professionals. Here’s a step-by-step overview of what to expect during the installation:
- Site Assessment: The installer will visit your home to assess your roof, electrical panel, and overall energy needs. They’ll also check for any potential shading issues that could affect the efficiency of your solar panels.
- Design and Permitting: Based on the site assessment, the installer will design a system that fits your needs. This design will be submitted to local authorities to obtain the necessary permits. The permitting process can take a few weeks, so be prepared for some waiting.
- Ordering Equipment: Once permits are approved, the installer will order the solar panels, inverter, and other necessary equipment. Delivery times can vary depending on the supplier.
- Installation Day: On the day of installation, the crew will mount the solar panels on your roof and install the inverter, wiring, and other components. This process typically takes one to three days, depending on the complexity of the system.
- System Inspection: After installation, the system will need to be inspected by local authorities to ensure it meets all safety and building codes. This inspection is usually a formality and is completed quickly.
- Connection to the Grid: Once the inspection is passed, your system will be connected to the grid (if applicable). Your utility company may install a new meter that can measure both the energy you use and the excess energy your system sends back to the grid.
- Monitoring and Maintenance: Many solar inverters come with monitoring systems that allow you to track the performance of your solar panels. Regular maintenance, like cleaning the panels and checking the inverter, will ensure your system runs smoothly for years.
Cost Considerations and Savings
The cost of solar inverter installation can vary widely based on factors such as system size, the type of inverter, and your location. On average, a residential solar system can cost between $10,000 to $30,000 before incentives. However, with tax credits and rebates, the cost can be significantly reduced.
Here’s a simple table to give you an idea of the potential savings:
| System Size (kW) | Cost Before Incentives | Estimated Annual Savings | Payback Period |
|---|---|---|---|
| 3 kW | $9,000 – $12,000 | $400 – $600 | 15 – 20 years |
| 5 kW | $15,000 – $20,000 | $600 – $1,000 | 10 – 15 years |
| 10 kW | $30,000 – $40,000 | $1,200 – $2,000 | 8 – 12 years |
It’s important to remember that the initial investment in a solar inverter system can lead to long-term savings on your electricity bills. Over time, you could see a significant reduction in your energy costs, making the investment worthwhile.
Conclusion
Switching to solar energy is a smart move, both for your wallet and the planet. Understanding the basics of solar inverter installation can make the process less intimidating and help you make informed decisions. Whether you’re looking to save money on your energy bills, reduce your carbon footprint, or gain energy independence, installing a solar inverter is a step in the right direction. Remember, every home and situation is unique, so take the time to assess your needs, work with a reputable installer, and enjoy the benefits of clean, renewable energy.
Visit SolarClue® to see the best Solar Inverter. SolarClue® actively sells solar energy products at discounts of up to 50% on its online marketplace.
FAQs
1. How long does the solar inverter installation process take?
The entire process, from the initial site assessment to the final connection to the grid, can take anywhere from a few weeks to a couple of months. The installation itself usually takes one to three days.
2. Can I install a solar inverter myself?
While it’s technically possible, it’s not recommended. Solar inverter installation involves electrical work and compliance with local regulations, which are best handled by professionals.
3. What maintenance is required for a solar inverter?
Solar inverters generally require minimal maintenance. However, it’s important to keep an eye on the system’s performance through monitoring software and to have the panels cleaned periodically to ensure maximum efficiency.
4. How do I choose the right size inverter for my home?
The size of the inverter should match the size of your solar panel system and your energy consumption. A professional installer can help you determine the correct size based on your energy needs and roof space.
5. What happens if my solar inverter stops working?
If your solar inverter stops working, your system won’t be able to convert the energy from your solar panels into usable electricity. Most inverters have warranties, and you should contact your installer or the manufacturer for repair or replacement.
With this guide, you’re now well-equipped to embark on your solar journey with confidence. Happy solar powering!


