Solar On-Grid Systems Installation Guide: How to Install
Solar energy has become increasingly popular due to its numerous benefits. Solar photovoltaic (PV) systems, in particular, offer a sustainable and efficient way to generate electricity. As people become more conscious of their carbon footprint and seek to reduce their dependence on fossil fuels, solar on-grid systems have gained traction. In this blog post, we will delve into what solar on-grid systems are and guide you through the installation process.
Table of Contents
Understanding Solar On-Grid Systems
Solar on-grid systems, also known as grid-tied or grid-connected systems, are designed to convert sunlight into electricity and feed it directly into the local power grid. These systems are connected to the utility grid, allowing users to benefit from both solar power and traditional grid electricity.
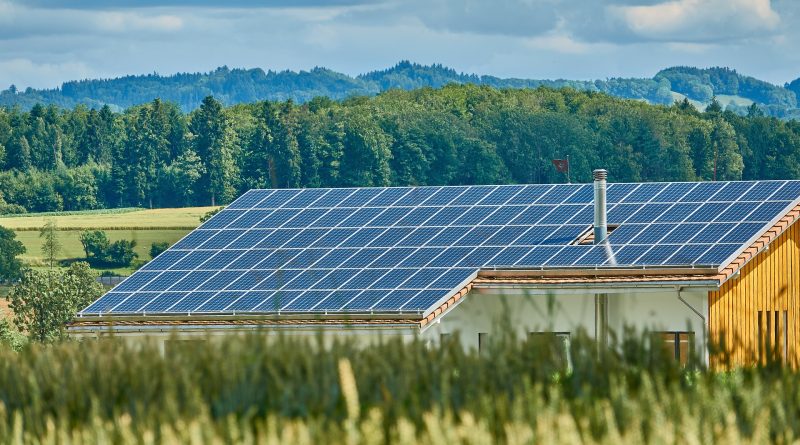
The core components of a solar on-grid system include solar panels, an inverter, a bi-directional meter, and a connection to the local power grid. The solar panels, usually mounted on rooftops or open spaces, absorb sunlight and convert it into direct current (DC) electricity. The inverter then converts the DC electricity into alternating current (AC) electricity, which is the standardized form of electricity used in homes and businesses.
Installation Process
Installing a solar on-grid system requires careful planning and adherence to local regulations. Here’s a step-by-step guide to help you through the installation process:
1. Assess Your Energy Needs
Before installing a solar on-grid system, it’s essential to determine your energy requirements. Evaluate your average monthly electricity consumption to get an idea of the system size you’ll need. You can consult with a solar installer or use online calculators to estimate the appropriate system capacity.
2. Choose the Right Location
The location of your solar panels plays a vital role in their efficiency. Select an unobstructed area that receives ample sunlight throughout the day. Typically, solar panels face south to ensure maximum solar exposure. Remember to consider any potential shading from nearby trees or structures that may affect energy production.
3. Engage a Professional Solar Installer
Installing a solar on-grid system involves electrical work, so it is essential to hire a professional solar installer. Look for reputable installers with relevant experience and certifications. They will ensure proper system design, code compliance, and smooth integration with your local power grid.
4. Engage a Professional Solar Installer
Obtaining necessary permits and approvals is an important step in the installation process. Contact your local authorities to understand the specific requirements and regulations for installing solar on-grid systems. These may include building permits, electrical permits, and interconnection agreements with the utility company.
5. System Design and Equipment Installation
Working closely with your solar installer, create a system design that meets your energy needs and aligns with local regulations. The installation process typically involves mounting solar panels securely, connecting them in series or parallel configurations, and connecting the inverter to the panels and the electrical grid.
6. Metering and Interconnection
To ensure a seamless flow of electricity between your solar on-grid system and the local power grid, a bi-directional meter is essential. This meter measures the energy produced by your solar panels and the energy imported or exported to the grid. It allows you to monitor your electricity consumption and any excess energy fed back to the grid.
7. Commissioning and Testing
Once the installation is complete, your solar on-grid system needs to be commissioned and tested. Qualified professionals will ensure the system operates efficiently and safely. They will perform various tests to verify that all components are functioning correctly and that the system complies with local regulations and safety standards.
Conclusion
Discover the eco-friendly and cost-effective world of solar on-grid systems. With SolarClue®, installing a solar on-grid system is not just about reducing your carbon footprint but potentially saving on electricity bills too. It’s essential to entrust the installation to professional solar installers, adhere to local regulations, and secure the necessary permits for a seamless setup. By harnessing the power of the sun, you not only benefit personally but also actively contribute to a cleaner and more sustainable future. Choose SolarClue® for a reliable and environmentally conscious solar on-grid system installation.
Frequently Asked Questions
A solar on-grid system is connected to the utility grid, allowing excess energy to be fed back, reducing reliance on the grid.
Follow our step-by-step guide for a seamless installation process, ensuring optimal performance.
Yes, many homeowners can undertake the installation as long as they follow safety guidelines and local regulations.
On-grid systems offer cost savings, grid support, and potential incentives, making them a popular choice for solar enthusiasts.
By generating clean energy and reducing dependence on traditional power sources, on-grid solar systems contribute to a greener, more sustainable future.
Depending on your location, there may be tax credits or other incentives for installing on-grid solar systems. Check local regulations for details.
Regular inspection, cleaning, and monitoring are essential for optimal performance. Our guide covers these maintenance aspects in detail.
No, on-grid systems are designed to shut down during power outages for safety reasons. Battery backup solutions can be considered for uninterrupted power supply.
Installation time varies but typically ranges from a few days to a couple of weeks, depending on system size and complexity.
Yes, check with local authorities for necessary permits and compliance with regulations before starting the installation process.


